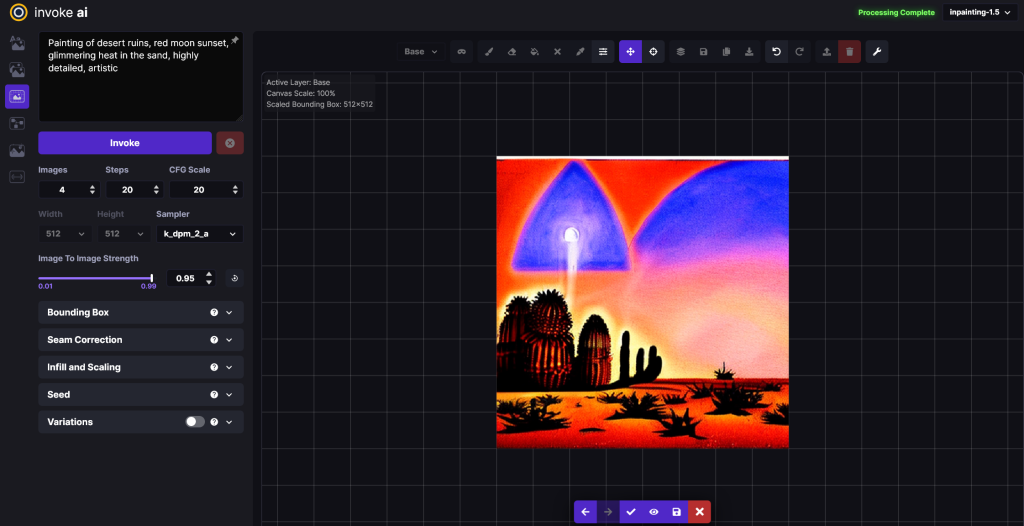
InvokeAI is a new addition to Stable Diffusion offering a really neat interface with tons of exclusive features. The interactive canvas is one of the best features about InvokeAI, you can input an image and draw around it, inpaint and outpainting both available! I’ve enjoyed using InvokeAI to expand a few of my image creation with great results. Since it is running on Stable Diffusion it can be a bit difficult to install for some people, below you can find the full installation guide directly from InvokeAI’s GitHub page.

Pre-Requirements
Make sure that you meet the hardware requirements and have the appropriate GPU drivers installed. In particular, if you are a Linux user with an AMD GPU installed, you may need to install the ROCm driver.
Installation requires roughly 18G of free disk space to load the libraries and recommended model weights files.
Installation
AlThough there are multiple steps, there really is only one click involved to begin the installation process.
- The source installer is distributed in ZIP files. Go to the latest release, and look for the automatic installer file. Download InvokeAI zip file installer.
- Unpack the zip file into a directory that has at least 18G of free space. Do not unpack into a directory that has an earlier version of InvokeAI. This will create a new directory named “InvokeAI”. This example shows how this would look using the
unzipcommand-line tool, but you may use any graphical or command-line Zip extractor such as 7-Zip or WinRar:C:\Documents\Linco> unzip invokeAI-windows.zip Archive: C: \Linco\Downloads\invokeAI-linux.zip creating: invokeAI\ inflating: invokeAI\install.bat inflating: invokeAI\readme.txt - If you are a macOS user, you may need to install the Xcode command line tools. These are a set of tools that are needed to run certain applications in a Terminal, including InvokeAI. This package is provided directly by Apple.
To install, open a terminal window and run xcode-select --install. You will get a macOS system popup guiding you through the install. If you already have them installed, you will instead see some output in the Terminal advising you that the tools are already installed.
More information can be found here: https://www.freecodecamp.org/news/install-xcode-command-line-tools/
- If you are using a desktop GUI, double-click the installer file. It will be named
install.baton Windows systems andinstall.shon Linux and Macintosh systems. - Alternatively, from the command line, run the shell script or .bat file:
C:\Documents\Linco> cd invokeAI C:\Documents\Linco\invokeAI> install.bat - Sit back and let the install script work. It will install various binary requirements including Conda, Git and Python, then download the current InvokeAI code and install it along with its dependencies. Be aware that some of the library download and install steps take a long time. In particular, the
pytorchpackage is quite large and often appears to get “stuck” at 99.9%. Similarly, thepip installing requirementsstep may appear to hang. Have patience and the installation step will eventually resume. However, there are occasions when the library install does legitimately get stuck. If you have been waiting for more than ten minutes and nothing is happening, you can interrupt the script with ^C. You may restart it and it will pick up where it left off. - After installation completes, the installer will launch a script called
configure_invokeai.py, which will guide you through the first-time process of selecting one or more Stable Diffusion model weights files, downloading and configuring them. Note that the main Stable Diffusion weights file is protected by a license agreement that you must agree to in order to use. The script will list the steps you need to take to create an account on the official site that hosts the weights files, accept the agreement, and provide an access token that allows InvokeAI to legally download and install the weights files. If you have already downloaded the weights file(s) for another Stable Diffusion distribution, you may skip this step (by selecting “skip” when prompted) and configure InvokeAI to use the previously-downloaded files. The process for this is described in Installing Models. - The script will now exit and you’ll be ready to generate some images. The invokeAI directory will contain numerous files. Look for a shell script named
invoke.sh(Linux/Mac) orinvoke.bat(Windows). Launch the script by double-clicking it or typing its name at the command-line:C:\Documents\Linco> cd invokeAI C:\Documents\Linco\invokeAI> invoke.bat
The invoke.bat (invoke.sh) script will give you the choice of starting (1) the command-line interface, or (2) the web GUI. If you start the latter, you can load the user interface by opening your browser and visiting http://localhost:9090.
The invoke script also offers you a third option labeled “open the developer console”. If you choose this option, you will be dropped into a command-line interface in which you can run python commands directly, access developer tools, and launch InvokeAI with customized options. To do the latter, you would launch the script scripts/invoke.py as shown in this example:
python scripts/invoke.py --web --max_load_models=3 \
    --model=waifu-1.3 --steps=30 --outdir=C:/Documents/AIPhotos
These options are described in detail in the Command-Line Interface documentation.
If you’re having trouble installing InvokeAI after following the instructions, I’d recommend deleting the folder you initially created and starting again. Unfortunately there is not a website which offers InvokeAI’s features yet, so if you are after it’s unique outpainting and canvas features you will have to install and run it locally from your machine.


